
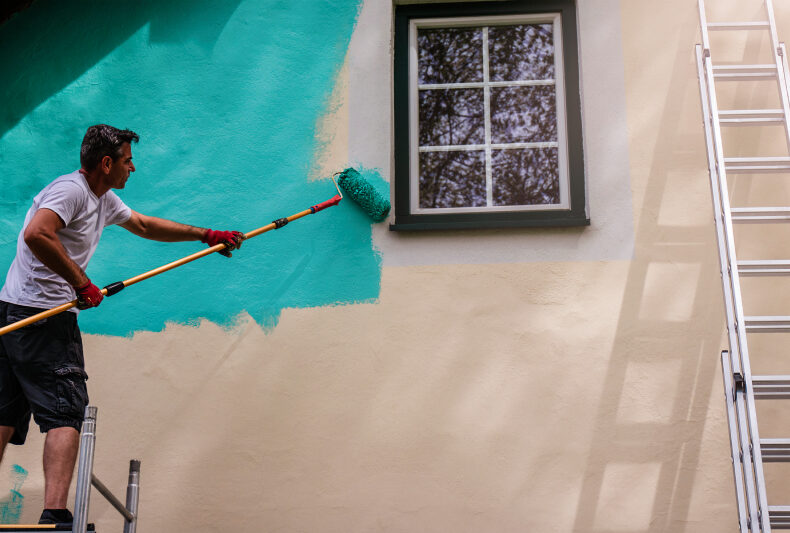
Exterior Painting Preparation for a Flawless Finish
While anyone can roll paint on a surface, a professional painter knows that a true, long-lasting finish starts long before the first brush stroke. In fact, the difference between a beautiful, durable coat and one that peels prematurely comes down to meticulous surface preparation. A DIY-er might face issues like warping and peeling paint because inadequate preparation allows moisture to damage the siding, leading to costly repairs.
As a homeowner, understanding this process protects your investment and your home’s long-term value. This insider’s guide to exterior painting will reveal the specific techniques that guarantee durability and master-level craftsmanship for your project.
A Foundation of Cleanliness Begins With Expert Washing and Inspection
- Before a single tool is touched, a professional walks the entire structure to conduct a thorough visual inspection. This crucial first step identifies underlying issues like wood rot and failed caulking that must be addressed before any cleaning begins.
- Once this initial survey is complete, the surface must be cleaned of all dirt, mildew, and grime, as these contaminants are the primary cause of poor paint adhesion. This is achieved through professional pressure washing, which involves a specific technique: washing from the bottom up to apply cleaner and rinsing from the top down to prevent streaking.This method involves using a pressure no greater than 1,500 PSI, holding the spray gun at a 45-degree angle, and maintaining a distance of about 12 inches from the wood surface to avoid damage.
- The next phase — the most critical step in the entire process and one often rushed by amateurs — is the extended drying period. This is because wood is porous; its high moisture content is a direct and primary cause of paint system failure and poor adhesion.
Professionals use a moisture meter to ensure levels are below the 15% threshold that guarantees a sound foundation for paint. This week-long wait is not a delay but a definitive sign of a quality exterior painting project, ensuring durability and a flawless finish. Only once the wood is verifiably dry can the next phase of mechanical preparation — creating a perfectly smooth and sound surface — begin.
Also Read : Elevate Your Home With the Psychology of Interior Painting
Creating the Perfect Canvas Through Meticulous Repair and Sanding
With the wood now thoroughly dry, this phase focuses on creating a perfectly sound and smooth surface.
- The process begins with removing all loose and flaking paint using a sharp, 4-inch flexible scraper. Here’s an insider tip: always scrape with the grain in a downward motion to smooth the paint edges for a seamless transition.
- After scraping, sanding is performed to further smooth those edges and, more critically, to create an optimal surface profile for paint adhesion. For this, 80-grit paper efficiently removes old paint residue, while 120-grit provides the ideal textured surface for the new coat to grip onto firmly.
- This stage also encompasses all necessary carpentry repairs, which are integral to a professional finish. Minor repairs include setting all nail heads below the surface and filling any small cracks or holes with exterior-grade wood filler.However, you must replace entire sections of siding or trim that show signs of wood rot. Therefore, this is a critical step, as paint will not adhere properly to rotting wood and can trap moisture inside, worsening the damage over time.
These combined steps of scraping, sanding, and repairing transform the surface into a uniform, stable substrate.
With every imperfection now addressed, the surface is finally ready for the critical protective layers of caulking and primer that will seal it from the elements.
Mastering Professional Sealing and Priming Techniques
The final stage of preparation focuses on creating a perfect, watertight seal to protect your home from moisture damage.
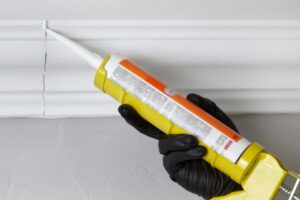
- This process begins with professional caulking, which acts as a critical barrier against water intrusion in vulnerable areas.You must apply caulking to all seams and joints around windows and doors to prevent moisture from penetrating the wood substrate. Professionals follow a specific sequence of techniques to achieve flawless results:
- First, cut your caulk tube tip at a 45-degree angle to match the joint size precisely.
- Maintain consistent pressure and speed during application to
- Finally, smooth the joint with a wet finger in one continuous motion for a perfect, finished appearance. create uniform, professional-looking lines.
- With the joints sealed, the next step involves protecting the entire surface with primer, which serves the dual purpose of sealing the wood and creating superior paint adhesion.
The choice of primer depends entirely on your specific wood type, particularly when dealing with challenging tannin-rich species. For cedar and redwood, professionals use a stain-blocking alkyd primer to prevent tannin stains from bleeding through the finish.
The application method is just as crucial as product selection. While spraying equipment provides efficient primer coverage, the true professional secret lies in the immediate follow-up technique.
You must back-brush all sprayed primer while it remains wet to work the product deep into the wood’s grain and texture. This mechanical process creates a superior bond that spraying alone cannot achieve, ensuring maximum paint adhesion and dramatically extending the longevity of your entire paint system.
These advanced sealing and priming methods create the ultimate protective shield, making the surface completely ready for the final coats of paint that will define its appearance and durability for years to come.
Invest in Preparation for Your Next Exterior Painting Project
The true success of an exterior painting project lies not in its final coat but in the meticulous foundation of its surface preparation. This process demands:
- A thorough inspection
- Expert cleaning
- A critical drying period
- Precise surface repair
- Correct application of primer
Consequently, this professional preparation, which accounts for the majority of a project’s time, is a direct investment that guarantees a long-lasting finish, providing your home with years of durability and protection from the elements.
If you now understand that these steps are the definitive factor for quality, you are equipped to identify and hire a professional painter or contractor who shares this commitment to craftsmanship.
Leave a Reply
You must be logged in to post a comment.